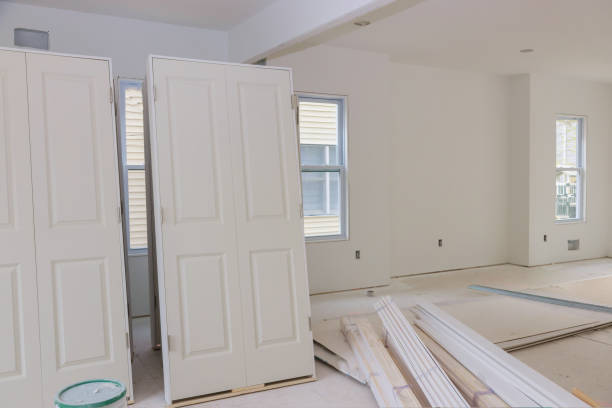
Installing a pre-hung interior door may seem like a daunting task, but with the right guidance and tools, it can be a rewarding home improvement project. Pre-hung doors are convenient because they come pre-assembled in their frames, making the installation process streamlined and efficient. Below is a step-by-step guide to help you install your pre-hung interior door with precision and ease.
Benefits of Using Pre-Hung Doors
- Time-Saving: Pre-hung doors come with the frame already attached, eliminating the need to construct or assemble the frame separately.
- Better Alignment: Because they are pre-assembled at the factory, they ensure proper alignment of hinges and the door within the frame.
- Ease of Installation: Ideal for new builds or extensive renovations where door frames may need replacing entirely.
Essential Tools and Materials
Tools:
– Tape measure
– Level (preferably 4-foot for more accuracy)
– Hammer or nail gun
– Screwdriver or drill with bits
– Utility knife
– Pry bar (if removing an old door)
Materials: – Shims (wooden or composite)
– Wood screws (1 ½-inch to 2-inch recommended)
– Construction adhesive (optional for additional stability)
– Caulk for sealing gaps around trim – Door casing/trim (if not included in your door kit)
Preparation Steps
- Clear Your Workspace: Start by removing any obstructions near your rough opening. If replacing an old door, use a pry bar to carefully remove it along with its existing frame and trim. Check that nails or fasteners from prior installations are completely removed.
- Inspect Your Rough Opening: Ensure that the rough opening is clean of debris and appropriately sized for your new pre-hung door. A proper fit allows about ½ inch clearance on each side of the frame for shimming purposes.
- Measure Carefully: Use a tape measure to confirm that both vertical sides of your rough opening are plumb (perfectly upright), while also ensuring that the header above is level.
| Measurement | Ideal Tolerances | Tips |
| Width | +½ inch clearance | Measure at three points—top, middle, bottom |
| Height | +½ inch clearance | Account for flooring height if installing after tiling/carpeting |
Installation Process
- Place the pre-hung door into your rough opening without securing it yet.
- Confirm that there is enough clearance on all sides for adjustments using shims.
- Begin by placing shims between one side of the jamb and framing studs.
- Use a level to check both verticality (side jambs) and horizontal alignment (header). Adjust shims until both aspects are properly aligned.
- Insert additional shims near hinge placements as they bear most weight once operational.
- Once everything is leveled using shims, temporarily secure one side jamb by driving two screws through its center.
- Re-check alignment before securing fully — especially near top hinges where sagging can occur over time if not done correctly.
- Ensure hinges line up perfectly before tightening screws connecting them directly into jamb woodwork.
- Close/open multiple times confirming smooth movement absence any unnecessary binding drag due-to misalignment hitches tighten gradually final anchoring remaining gaps filled trimming possible caulking
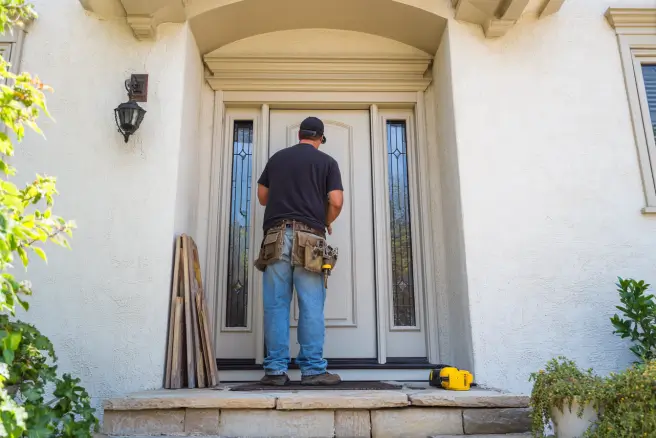
Understanding Door Replacement in Rockville, MD: Why Pre-Hung Interior Doors Are a Popular Choice
A pre-hung interior door is an all-in-one door system that comes pre-assembled in its own frame. This design eliminates the need to construct the doorframe separately, making installation more efficient and straightforward. Pre-hung doors are especially popular due to their convenience, versatility, and ability to deliver a polished, professional look once installed.
Nova Exteriors Inc. Rockville
https://www.novaexteriors.com/rockville-door
Key Features of a Pre-Hung Interior Door
- Pre-Assembled Frame: The door is already attached to its frame with hinges properly mounted.
- Ease of Installation: Requires less precision compared to installing a slab door (just the door without the frame).
- Includes Essential Components: Comes with casing or trim, weatherstripping (if applicable), and pre-cut hinge mortises. In some cases, it may also include holes for locks or handles.
- Variety of Styles: Available in countless materials, colors, and finishes to suit any aesthetic.
Why Homeowners Choose Pre-Hung Doors
- Time-Saving Installation
A pre-hung door arrives ready-to-install, reducing labor time significantly compared to traditional slab doors. For both DIYers and contractors, this is an appealing benefit. - Professional Appearance
Because it includes a cohesive frame system, there’s less room for error when it comes to alignment or fit. The result is smooth operation and a polished appearance. - Durability
The consistent assembly ensures that all elements of the door—the hinges, frame, and jamb—are designed to work together seamlessly for long-term durability. - Versatility Across Projects
Whether you’re remodeling your home or constructing new spaces from scratch, these doors accommodate various interior styles—modern, rustic, minimalist—while streamlining installation.
Pros & Cons Table
| Pros | Cons |
| Quick and easy installation | Heavier than slab doors |
| Reduces alignment guesswork | More expensive than slab options |
| Ready-made fit with hinges | Requires precise rough opening dimensions |
| Enhanced aesthetics | Difficult to customize post-installation |
When Should You Use a Pre-Hung Door?
- New Construction: Ideal for freshly built homes where frames aren’t yet installed.
- Major Renovations: When upgrading old doors along with their frames.
- Replacing Damaged Frames: If your existing frame has structural damage (warping or rot), opting for a pre-hung unit ensures proper functioning without having to repair or measure out new components manually.
On the other hand, if you only need to swap out the actual door while preserving an existing frame that’s still in excellent condition, then it might be more economical to choose a slab door instead.
Popular Materials Used for Pre-Hung Doors
- Solid Wood: Sturdy construction with natural appeal; ideal for high-end looks.
- Hollow Core MDF (Medium Density Fiberboard): Lightweight and budget-friendly option suitable for most interiors.
- Solid Core Composite Wood: Offers better soundproofing properties while being more affordable than solid wood.
- Metal or Aluminum Clad Options: Typically used in industrial-style interiors but gaining traction among modern homeowners as well.
With their ease of use and versatility across styles and budgets alike, it’s no surprise why pre-hung interior doors remain one of the most popular choices among today’s homeowners aiming for functional yet aesthetically pleasing upgrades within their living spaces.
Step-by-Step Guide to Measuring Rough Openings for Doors in Rockville, MD
Properly measuring the rough opening is a critical step in ensuring that your door fits correctly and functions as intended. A miscalculation at this stage can lead to numerous issues during installation, such as improper alignment, difficulty closing the door, or even the need to restart the process. Follow these steps to measure your rough opening with accuracy and confidence.
Tools You’ll Need:
To measure your rough opening accurately, gather the following tools:
– Tape measure (preferably one with clear markings)
– Pencil or marker for notes
– Notepad or measurement log
– Level (optional but helpful for checking plumb and square)
Steps to Measure the Rough Opening:
- Place your tape measure horizontally across the bottom of the rough opening from stud to stud. Record this measurement.
- Repeat this process at the middle and top of the opening. This ensures you account for any irregularities in width.
- Use the smallest of these three measurements as your official width.
- Position your tape measure vertically from the subfloor (or finished floor if applicable) to the underside of the header at one side of the opening. Record this value.
- Repeat on both sides as well as in the center of the opening.
- Again, use the smallest measurement here for accuracy.
- Measure from one edge of drywall or plaster on one side of the wall to its counterpart on the other side. This will determine whether you need special jamb extensions for thicker walls.
- Using a level (or a square), check whether corners are aligned perfectly at 90-degree angles. Out-of-square openings may require adjustments during installation.
- Account for Clearance:
When recording final numbers, remember that doors require some clearance around them for functionality:- Typically, you’ll want about 1/4 inch on each side between frame and door jamb.
- Leave approximately 1/2 inch between door bottom and floor covering.
Table Example: Recording Measurements
| Measurement Area | Recorded Value | Smallest Measurement Used? |
| Width (Bottom) | X inches | Yes/No |
| Width (Middle) | X inches | Yes/No |
| Width (Top) | X inches | Yes/No |
| Height (Left Side) | Y inches | Yes/No |
| Height (Right Side) | Y inches | Yes/No |
| Wall Thickness | Z inches | N/A |
Tips for Accurate Measurements:
- Always double-check measurements before purchasing or cutting materials.
- If walls are uneven, note any inconsistencies so they can be addressed during shimming or leveling.
- Write down all values clearly rather than relying on memory while shopping or installing.
An accurate rough opening measurement ensures smoother installation with fewer corrections needed later in the process. Taking time during this stage will save both money and effort when it’s time to install your pre-hung interior door.
Step-by-Step Guide from a Door Company in Rockville, MD to Prepare the Door and Rough Opening Before Installation
Proper preparation of both the door and the rough opening is essential for a smooth installation process. Skipping these steps can lead to issues like misalignment, improper sealing, or difficulty closing the door. Below is a detailed guide to help you ready everything before proceeding with installing your pre-hung interior door.
Assessing the Rough Opening
- Measure the height, width, and depth of the rough opening.
- Ensure there is at least 1/2 inch of extra space on all sides of the pre-hung door frame for adjustments during installation.
- Use a carpenter’s square to confirm that all corners of the rough opening are at 90-degree angles.
- Out-of-square openings will require shimming or additional trimming before proceeding further.
- Inspect framing members around the opening for any damage, rot, or loose components.
- Reinforce or replace compromised sections as needed.
- Verify that both sides of the rough opening are plumb (vertically straight). Use a long level for accuracy.
- Check that the floor beneath is level; if not, adjustments will be necessary later when setting shims.
Preparing the Door Frame
- Check for any visible damage on both the frame and door panel.
- Ensure hinges are securely fastened, and confirm proper alignment by testing how smoothly it swings within its frame.
- Remove Packaging Materials
Carefully remove all packaging materials from your pre-hung unit without damaging hardware or finish. - Attach Temporary Fasteners (Optional)
To stabilize your pre-hung unit during handling and initial placement into the opening: - Place temporary screws through hinge plates into their respective jambs.
- Test Fit in Rough Opening
Insert your pre-hung door into place temporarily:- Confirm that there is adequate clearance between jamb edges and framing around all sides.
- Make note of areas where shims may be required during leveling later.
Prepping Surrounding Areas
- Clear Debris: Remove dust, sawdust, nails, or anything else left inside surfaces around studs within walls forming enclosure gaps next step ahead installation
Step-by-Step Instructions for Door Repair Rockville, MD: Preparing the Door and Rough Opening Before Installation
Proper preparation of both the door and rough opening is crucial for ensuring a smooth, hassle-free installation process. Skipping or rushing through this step can result in alignment issues, gaps, or difficulty operating the door. Below is a detailed guide to help you prepare effectively.
Inspecting the Rough Opening
- Use a 4-foot level to check whether the sides (studs) of the rough opening are plumb (vertically straight).
- Place the level across both the top and bottom of the opening to ensure it’s level horizontally.
- Measure the width of your rough opening at three points: top, middle, and bottom. Ensure it is at least 1 inch wider than your door frame to allow room for shims and adjustments.
- Measure the height from floor to header in two places (left and right side). The height should be about 1/2 inch taller than your door frame to accommodate flooring clearance.
- Examine studs for warping or bowing that could interfere with proper alignment of the frame.
- Sand down or plane any protruding areas if needed.
Preparing the Rough Opening
- Clear Debris: Remove nails, screws, insulation remnants, or other obstructions from within the rough opening.
- Correct Uneven Surfaces: If surfaces are uneven, use wood shims or add spacers behind studs where necessary.
- Seal Gaps (Optional): For energy efficiency, seal large gaps with foam insulation around exposed sections of framing.
| Task | Recommended Tools/Materials |
| Leveling & Checking Plumb | Carpenter’s level |
| Measuring Dimensions | Tape measure |
| Smoothing Studs | Sandpaper/Plane |
| Filling Gaps | Expanding foam |
Preparing Your Pre-Hung Door
- Ensure there are no damages such as cracks or warping in the frame.
- Confirm that hinges are securely fastened to hold weight during installation.
- Take off all packaging material from both the frame and door surface carefully without scratching finishes.
- Identify which direction your pre-hung door will swing by marking hinge-side placement on its frame.
- Place your door lightly into position within its rough opening without securing it yet—this will help identify if additional adjustments are required.
Final Notes Before Installation
- Double-check measurements as errors here affect everything that follows.
- Address structural defects upfront rather than troubleshooting halfway through installation.
How to Level, Shim, and Secure Your Door Frame for Perfect Alignment
Properly leveling, shimming, and securing your door frame is a critical step in ensuring that your door operates smoothly and lasts for years. Misaligned doors can lead to uneven gaps, improper latching, and accelerated wear on hinges. Follow these detailed instructions to achieve a professional-grade installation.
Why Proper Alignment Is Important
Before diving into the process, it’s important to understand that proper alignment:
– Ensures smooth opening and closing of the door.
– Prevents unnecessary stress on hinges and hardware.
– Provides an aesthetically pleasing finish with uniform gaps around the door.
– Minimizes drafts or light leakage through unwanted gaps.
Tools and Materials Needed
| Essential Tools | Materials |
| Level (2-foot or 4-foot) | Wood shims |
| Tape measure | Nails or screws |
| Hammer or drill | Construction adhesive (optional) |
| Utility knife | Insulation foam (optional) |
1. Check for Plumbness of the Rough Opening
Before placing the door frame into the rough opening:
– Use a level to verify that both sides of the rough opening are plumb (vertically straight).
– If adjustments are needed, use wood shims behind the framing studs until they are perfectly vertical.
2. Insert the Door Frame in Place
Carefully position the pre-hung door frame into the rough opening:
– Ensure there is an even gap between the frame and opening on all sides.
– Use temporary screws or nails to hold it loosely in place while making adjustments.
3. Shim for Proper Alignment
Shims are crucial for creating tight contact between the frame and wall while maintaining alignment:
– Start with one side of the frame at about 6 inches from the top hinge location. Insert shims between the wall stud and door frame until there is no movement when pressure is applied to that area. – Repeat this process near each hinge location as well as along any other points where gaps are uneven. – On each side of the frame, check alignment with a level after every adjustment.
Pro Tip: Avoid Over-Shimming
Too many tightly packed shims can cause bowing in your jambs—use just enough pressure to fill gaps without distorting material.
4. Level Across Both Dimensions
Once shims are inserted along vertical jambs: 1. Place a level horizontally across both top corners of your door header. 2. Adjust any sagging by inserting additional shims beneath low areas until perfectly horizontal.
5. Secure Your Door Frame
After confirming plumbness across all dimensions: 1. Drive nails or screws through pre-drilled holes in hinges into solid wood backing where possible. 2 . Start securing fasteners lightly initially; tighten only after double-checking final levels/gaps consistently remain accurate post-tightening .
Step-by-Step Guide to Installing Door Trim and Adding the Finishing Touches
Adding trim to your newly installed door and finalizing the details can elevate the look of your space while ensuring a polished, professional appearance. Door trim not only hides imperfections around the frame but also provides a visual accent that complements your interior style. This guide walks you through installing door trim and highlights key finishing touches to complete the project.
Tools and Materials You’ll Need
- Measuring tape
- Miter saw or hand saw
- Nail gun or hammer
- Level
- Utility knife
- Caulking gun
- Pre-cut door trim (or molding of choice)
- Finishing nails or brads
- Wood filler or caulk
- Paint or stain (if required)
Step-by-Step Process for Installing Door Trim
- Measure and Cut the Trim Pieces:
Start by measuring each side of the door frame where the trim will go. Typically, you’ll need three pieces—two vertical side trims (called jamb casings) and one horizontal top piece (the head casing). Use a miter saw to cut each end at a 45-degree angle for clean corner joints. - Dry Fit the Trim Pieces:
Before nailing them into place, dry fit all three pieces around the door to ensure proper alignment. Make adjustments as needed to achieve consistent gaps and tight corner joints. - Attach Side Casings First:
Begin with one vertical side casing. Position it flush with both the wall surface and edge of the door jamb. Use a nail gun (or hammer) to secure it in place, spacing nails about every 12 inches. - Install Top Casing:
Once both side casings are secured, position the horizontal head casing at the top of the door frame. Ensure its corners align seamlessly with those on each vertical casing piece before nailing it securely into place. - Join Corners Smoothly:
Check that all mitered corners fit snugly together without gaps. If necessary, use wood filler or caulk to fill in minor imperfections at these joints. - Fill Nail Holes:
Cover all visible nail holes with wood filler or spackling compound for a seamless look once painted or stained.
Adding Finishing Touches
- Caulk Gaps Around Edges: Fill in any gaps between edges of trim and walls/jambs using paintable caulk for a smooth transition.
- Sand Edges if Needed: Lightly sand any rough spots on wood surfaces for an even finish.
- Paint or Stain Your Trim:
- If painting, choose a high-quality semi-gloss or gloss paint that matches your room’s color palette.
- For stained woodwork, apply an appropriate stain followed by protective polyurethane for durability.
- Inspect Alignment & Finish Quality: Ensure everything is level, clean up excess caulk/paint/stain spills immediately while wet drying takes over next few hours/hardware tightening check-ins improve reusability long-term success ensuring professionalism neat finishing demand satisfied..
The result? A beautifully framed doorway that not only enhances functionality but also complements interior decor seamlessly within intended style choices/settings preferences overall satisfaction customers/users alike assured
Step-by-Step Guide to Installing Door Trim and Adding the Finishing Touches
Installing door trim and finishing touches is the final step in the door installation process. Properly installed trim enhances the visual appeal of your room while covering gaps between the frame and wall. This section provides a detailed guide on how to install interior door trim effectively.
Tools and Materials Needed
Before getting started, ensure you have all necessary tools and materials:
– Tools
– Miter saw
– Tape measure
– Nail gun or finish nails
– Level
– Hammer (if not using a nail gun)
– Utility knife or painter’s tool
- Wood or composite trim pieces (casing)
- Wood filler or caulk
- Paint or wood stain (optional)
Step-by-Step Trim Installation Process
- Measure each side of the door frame where the trim will be installed. For clean corners, cut trim pieces at a 45-degree angle using a miter saw. Ensure that top and side trims align seamlessly for a polished appearance.
- If you’re using pre-measured molding, double-check that it fits snugly before securing it to the wall.
- Begin with one vertical side piece (often called casing). Position it snugly against the door jamb, ensuring it is flush with both edges of the frame.
- Use a level to confirm alignment before attaching. Secure it in place using finish nails or your nail gun, spacing nails approximately every 12–18 inches.
- Take your top piece of trim and position it above the door opening so its angles meet seamlessly with both side casings.
- Verify alignment; then use finish nails to secure it in place.
- Repeat step two for the other vertical piece of trim, ensuring its mitered edge aligns perfectly with that of the top casing.
- Use wood filler to fill any visible nail holes for a smooth finish once painted or stained.
- Apply caulk along seams between casing edges or where gaps exist between wall surfaces for extra polish.
- Lightly sand areas with excess filler for smoothness.
- Apply paint, primer, or wood stain depending on desired aesthetics.
Best Practices for Finishing Touches
- Ensure Consistent Spacing: Maintain uniform spacing between each piece of molding during installation.
- Use High-Quality Caulk: Select flexible caulk designed for interior use to prevent cracking over time.
- Paint Before Installation: If painting is required, consider painting individual pieces prior to attachment for easier cleanup around edges.
- Test Fit Before Nailing: Dry-fit each piece before attaching permanently; this allows you time to make necessary adjustments without damaging materials.
| Task | Tools Required | Time Estimate |
| Measuring & Cutting | Miter Saw, Tape Measure | ~15 minutes |
| Installing Side Casings | Nail Gun/Hammer | ~20 minutes per side |
| Attaching Top Casing | Nail Gun/Hammer | ~10 minutes |
| Filling & Sanding | Wood Filler/Utility Knife/ Sandpaper | ~20 minutes |
| Painting/Staining | Paintbrush/Stain | ~30–60 minutes |
Adding door trim not only completes your project but also elevates your home’s overall aesthetic value when done right.
- Comprehensive Guide to Door Installation in Rockville, MD: Step-by-Step Instructions
- Step-by-Step Guide to Door Replacement Rockville, MD: How to Replace an Interior Door
- A Comprehensive Guide to Door Replacement Rockville, MD: Step-by-Step Instructions
- Factors to Consider for Door Installation in Rockville, MD and Costs
- Comprehensive Guide to Door Installation Rockville, MD: Repair and Replacement Tips
- Efficient Tips for Door Installation Rockville, MD Residents Can Rely On